Showing posts with label sewing. Show all posts

Saturday, March 3, 2012

Easy infinity (circle) scarf


Easiest project ever! This is a polyester knit. I used Maybe Matilda's tutorial as a reference, but made a slight deviation. Cut long, wide piece. Fold wrong sides together. Sew using ballpoint needle and zig-zag stitch along long side all the way until a few inches from one end. Turn right-side out. Take two short ends and using the side that you left unstitched a few inches, match it up with the other side, wrong sides together. Sew together. Turn end back right-side out. Then you'll have a small hole -- fold the edges in, place two sides together and sew with a zig-zag stitch (this will be visible, but once you're wearing your circle scarf, that little stitch will be lost in the folds of the fabric, I promise).

Ta-da!

So easy.

The really exciting thing: I also made a tank with this fabric. Will be sharing that soon!

Monday, January 23, 2012

1-2-3 Sew Craft Tote


My best friend turns 32 today. We've known each other since we were 18. That's 14 years, apparently. Fourteen years! We've seen one another grow up, fall in love, get married and start careers. We've supported one another spiritually. We've run half-marathons together. We've done a lot of laughing together. And I've received too many hand-made gifts from her to count. She's a knitter, and a fine one, and at least once a year for the last seven or eight years, she's gifted me some wonderfully hand-knit item. It was about time I returned the favor!


I saw this craft tote tutorial in the book 1-2-3 Sew and decided it'd be great for her to carry her knitting supplies around. The fabrics are from Amy Butler's new "Lark" line of fabric. They're home dec weight. The tutorial calls for canvas, so right away, I had a problem. But it was not too hard to solve. I lined all the outer pieces, the inside bottom piece and the compartment dividers all with fusible fleece. That seemed to do the trick, and the bag sits up nicely and holds its shape.


 I did have to go back and readjust my seams on the lining pieces multiply times, because when I went to fit it inside the shell, it was bunching up. I don't know why -- I swear I cut accurately this time. But what can you do? Taking the seams in a bit here and there worked well, and for the most part, the inside lays nicely in the shell. I love all the divided areas, perfect for stashing different crafting tools!


It also has three divided pockets in the front, for extra storage options. And while the tutorial called for straps made out of webbing, I decided to make my own from the fabric. They also have a bit of fleece inside. Saved me a trip to the store more than anything, but I think they're cute, too.

This bag took me about a week to make, but only because my sewing time is so limited to little bursts here and there. It was a very straight-forward project. A great first project to try from his new book!

Happy birthday, Kelly! Hope you love it!

Linked up at....


Creative ItchSew Chatty

Friday, January 13, 2012

A potholder for a friend


I made this extra-large potholder for a friend this week. On New Year's Day, hanging at her house, she brought out a Calaphon Dutch oven and an indoor grill pan, both of which she was no longer using. She said I could have them. I was thrilled because those are two pans missing from own kitchen. Score!

I decided to make her something to thank her and landed on this potholder thanks to a new email rolling into my inbox each day. It's called the Sew Can She Newsletter. They deliver one sewing tutorial to you each day. Free! Not bad, right? The tutorials come from all over blog land, and you can submit your own to be considered. It's just another easy way to find inspiration and tutorials you might otherwise miss. So last week, the email include a potholder tutorial that used this exact same coffee cup fabric! I had it in my stash awaiting some sort of inspiration, so I took it as a sign and whipped this up. I didn't use fusible thread, as the tutorial calls for, but that's a good idea I'll have to look into. And I just did some straight-line quilting with a zig-zag stitch thrown in.

Hope my friend loves it! The finished size is about a 10-inch square, which is really large. Nice for use as a counter-top hot pad, too!

Oh and hop over to the blog Boy Oh Boy Oh Boy! Stacey is gearing up for a year-long Sewing for Boys sew along! Fun! They featured one of my Henry Shirt posts this week. Thanks for the invite, Stacey!

Tuesday, January 3, 2012

2012 Sewing Inspiration

I trekked to the book store yesterday to return a book I received for Christmas. I hightailed it right to the sewing books, pulled five or six off the shelves and sat in a chair for 30 minutes thumbing through them, trying to decide which one to buy. They all had great looking projects in them; how I wish I had $100 or more to just drop on new sewing books. But I finally decided on this one:


1-2-3 Sew, by Ellen Luckett Baker of the great blog The Long Thread. I like the progression of projects and the way they help you build your skills. I could use some work on my skills. There are a few projects inside I'm particularly excited about.


The Circle Floor pillow, Pleated Satchel, Yo-yo Scarf and Initial Blanket are tops on my list. Aren't these all so cute? And each project would expand on my skills since I've never done reverse applique, a heavily pleated projects, any fabric yo-yos or even a basic blanket stitch. I have lots to learn!

Did you get a new source of sewing inspiration over the holidays? There are so many great books out there, do share which one is topping your list right now!

Saturday, December 31, 2011

Last handmade gifts!

I have been on a major French press kick lately. My drip-coffee pot just wasn't giving me as deep a flavor as I wanted. And my mornings are slow and laid back these days, so it is nice to take the time to boil water and steep and press the coffee myself.

And look! My friend Jen made me this adorable sweater cozy for my press! It's made from a thrifted little girl's sweater. Isn't it adorable? And it serves a great function, too, keeping that precious coffee warm while you enjoy your first cup and wait for the second. What a sweet Christmas present!

We had breakfast out yesterday and exchanged our handmade gifts. For her, I made something near and dear to me -- a covered notebook! I love a brand new notebook, as I've said, and especially around the New Year when all sorts of resolutions, reflections and goals are bouncing around your head. You need to write that stuff down.


Now she has a place to do so! And I had to show it all wrapped up, because that donut wrapping paper is my favorite.

Happy New Year everyone! I might be back later to share my favorite photos of 2011. It will be a most self-indulgant post. And I'm not going to apologize for it at all. Cheers!

P.S. Also, I changed my header. Thoughts?

P.S.S. I really love this article: 12 Things Happy People Do Differently. I hope to do all those things more often in 2012. Especially No. 1. And No. 8 -- experience the flow -- that's sewing for me. So more sewing in 2012, too!

Friday, December 30, 2011

2011 retrospective: A year of sewing

Here's a mini look at just about everything I made in 2011. Not every little thing is on here (including my most recent! Forgot the puppet theatre!) But most of it is there.


Looking at this, I'm kind of impressed with the amount I was able to do in a year. Go me! I suppose if you break it down, this is still less than one finished project per week. But I will so take that.

Let's break it down further, shall we?

I made four bags: a roll-up grocery bag, my Going-on-a-Walk bag, and the 241 Tote and the Go Anywhere bag, both from Noodlehead. Also did a clutch.

I made four pillows: a patchwork pillow, a crochet doily pillow, a monogrammed pillow, and an embroidered pillow for Jack's room.

I made a bunch of kid stuff: bibs, burp clothes, a nursing cover, baby shoes, baby blocks, sun hats and more sun hats, super hero capes, appliqued shirts, a bird mobile, a baby blanket and a taggy blanket.

I made clothes! Four different skirts, two dresses, a button-up shirt for Luke, two Halloween costumes, a bow-tie, a shirt for myself and my scarflette!

I made gifts. A baby's first Christmas ornament, a baby gift set, an apron or two, the puppet theatre, coasters, a quilted sunglass case, a dahlia pin (for myself) and a photo necklace.

I have learned this: I rarely want to make the same thing twice. This is why I could never have an etsy store! I am most content when I am learning something and trying something new. The side effect is that I rarely master any one thing. But that's a tradeoff I'm OK with. Wouldn't it be boring to always make... bibs or little kid clothes?

So, what will 2012 bring? Some of the same. But many new things and projects, I'm sure. Maybe my first quilt? Or a dress I make for myself, start to finish? I'm excited to see.

Mostly, I'm just exciting that I know I will always, always find something to be inspired by -- and another good excuse to buy more pretty fabric.

Here's to a happy 2012 all! Cheers!

Thursday, December 29, 2011

Olive and S puppet theatre and holiday recap!

Brotherly love on Christmas morning at grandma's house.

Had to share this one because as my husband put it, Luke looks like he is about to poop a turd of happiness. Hahahaha.
Hi everyone! I hope you had a wonderful holiday. We did. It was nice -- and also so very tiring and hectic! We had things going on and people to see Friday, Saturday and all day Sunday, and then we were both back to work on Monday and Tuesday. Wednesday was spent sorting through my house, trying to get this disaster area in order. The aftermath of Christmas is always a mess, isn't it? Boxes, wrapping paper, twisty ties, toys everywhere. Thing must be put together. Old toys must be stored. New toys must find new homes. And of course, everything must be played with. It's all intense. I was still wearing my robe and PJs yesterday at 2 p.m. And I was pretty much fine with that.

The hectic-ness of the last two weeks did me in when it came to handmade gifts. I had so many plans for handmade gifts. I accomplished only two of them. The Olive and S puppet theatre for my boys and an apron for my mother-in-law. The apron was finished around midnight on Christmas Eve because I scraped my first totally finished apron and started over from scratch at about 10:30 p.m.. I do not recommend this. Stress! Hello, stress!

I'll share more about the apron fiasco later. For now, can I show you the finished puppet theatre?


I am pretty happy with how it turned out. Of course, I know every little thing that is wrong with it (uneven bottom anyone?). But overall, I think it looks cute, and it's completely functional, and Luke took right to it.

If you plan to make this project, know that the instructions are great, but there are many many steps and this is something that takes hours. I'd guess I put at least 10 hours into this. Not a quick turnaround by any means. But I have a feeling we will be playing with this for years and years.

Did you give any handmade gifts this year? Did they get the reaction you hoped for?

Tuesday, November 22, 2011

Baby blanket for Rhonda


I made my cousin this blanket and gave it to her at her baby shower last weekend. She's due to have a baby on Jan. 31 -- the day JJ was born last year! I'm hoping the second cousins can share a birthday. Wouldn't that be fun?


I used a tutorial from the book Simple Sewing for Baby as my inspiration, but didn't make the pocket. It's meant to be a play quilt for the floor, and it could be used as that for sure. But look how perfectly it fits in a crib, too! (And although I use sleep sacks for six months or so, here's my dirty little secret -- we're totally using a blanket in the crib these days. Shhhh. I think it is OK.) The front fabrics mostly came from an Erin McMorris fat quarter bundle, from the line Summersault. Aren't they happy? I mixed in a solid green from a sheet I thrifted as well as that green-and-pink dot fabric, which I had in my stash and matched really well.


The back is minky.

I thought it turned out well, but the next baby shower, I won't gift a blanket again. I think my cousin literally received 20 blankets from a shower with 23 people at it. There were at least four other handmade blankets. Ug! And mine was opened last. So that was it for me and baby blankets, unless someone asks for one. There are so many cute ideas out there for baby gifts, for really practical things... Changing pad, diaper and wipe holders, bibs, snugglers, etc. I'm sticking to those from now on!

Friday, November 4, 2011

One more Henry Shirt post: Pictures and resources


There it is! My Henry Shirt in action. Isn't it cute? I really do love it. I'm so thankful for this Sew Along because I don't know I would have tackled this project without it.

Two notes about those photos: isn't that dogwood a wonderful red? I love it in the fall. And yes, my kid is wearing his pants backward. You're not crazy. 

Back to the Sew Along wrap-up: I learned so much. I know next time the results will be even better. I want to jot down a quick list, for my reference and anyone else's. Here are some things I would do differently next time:
  • Take more time cutting. I think my cutting was not 100% as accurate as it could be. 
  • Use 3/8 inch -- or maybe even 1/2 inch -- seams. This is because I make such skinny little children. (Like, my 3-year-old weighs less than 30 pounds.) The shirt doesn't fit too badly honestly, but a slimmer cut would work well, too. 
  • Try a fabric besides cotton. I love cotton for the ease in sewing and the fabulous patterns and for being the fabric I'm most comfortable working with. But I think it might be good to try a different textile for this shirt, especially for the main body pieces. 
  • I'd follow Leila's lead and cut the shirt a little longer. I believe she did that by adding two inches or so to the main front panels, the side panels and the back. This would help not just to lengthen the shirt but to make my hemming issue a non-issue. 
  • I'd add some top-stitching to the pockets and the collar. 
  • I'd like to try buttons next time, if only because these snaps just aren't working for me! (And I realize the issue there is probably me.) After I took these photos, they all basically popped off. 
  • My collar skills need work. This one is a little messy. 
If you want to make your own shirt and follow along with this Sew Along at some later point, here are all the posts you need.
Also, here are a few links to some other relevant Web sites and resources.

Sewing for Boys: Official Web site
One Girl Circus: Blog of book author Karen LePage
Patterns by Figgy
Sewing for Boys Flickr Group

That's it! Thanks to anyone who followed along. :) I can't wait to try something else from this book. What should we do next?!

Wednesday, November 2, 2011

Henry Shirt Sew-Along, Day Six

Little known fact about me: I am terrible at finishing projects. Like, I very jazzed about the idea and the starting and say jazzed all the way up until I am about 90 percent of the way in. Then those last few steps somehow feel like torture. Tomorrow will be brutal. How will I ever possibly hem a shirt and put on some snaps without melting into a puddle on my floor?

But that's tomorrow. Today, we're still good. We're in the 90 percent. Occupy the Henry Shirt!

OK, I'm off my rocker right now. Let's get to it.

Today we form and attach the collar.


Start with a simple 3/8 inch press on the bottom of your outer collar piece. Make sure you've got the right bottom! I referred back to the pattern paper just to make sure.


When you line up the under collar to the main collar, you'll notice something. It's smaller! This was a scary moment for me, because I often cut things a little wonky. But in this case, the pieces are meant to be different, because you cut the under collar on the bias. Which is a fancy way of saying, this piece of fabric will stretch, and so it is OK that it is a tad smaller.


Here they are with one side sewn together. See? Stretchy! 


I should have said this earlier in this process, but a good iron and a lot of pressing is so helpful. You've got to iron the hell out of all your seams after each step of the process to make things really lay properly. It's a life-saver! I especially went wild with my iron after this step above, where I sewed the two short ends together.


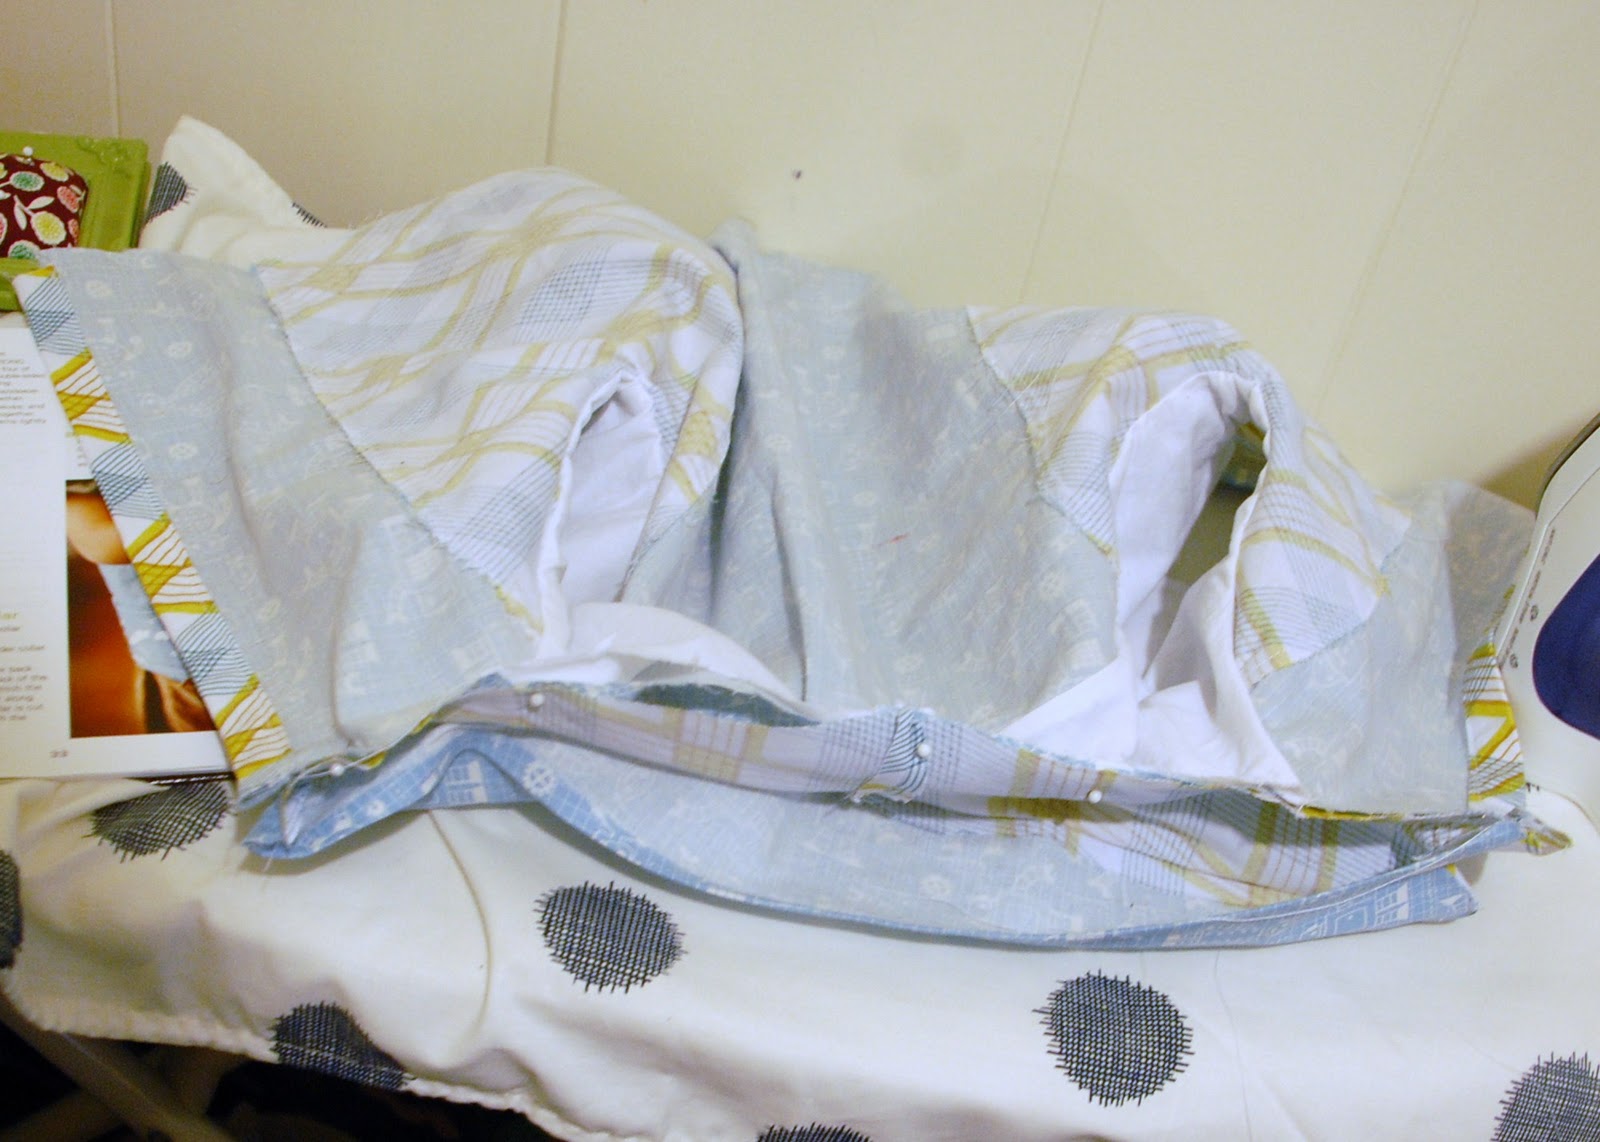
Then you attach the collar to lining to the shirt, leaving the main piece floating free. That gets sewn together first.


And that's the last good photo I have of the process!

You'll flip the collar over and line that folded edge up, covering the unsightly seam bits on the inside of the shirt. Then you edge-stitch it down.

And then look at that....


Your shirt is really now a shirt!

Check out my Sew-Along partner Leila's nearly finished project on her blog, Bilingual Baby. We're almost done, which means I must summon all my will-power to not rest happy with what I've done so far. Cause I'm really happy with that. Like, I just want to put the shirt under my pillow for safe-keeping. But I won't. I'll finish it, I promise. Check back tomorrow to see!

Tuesday, November 1, 2011

Henry Shirt Sew-Along, Day Five -- here she goes

Day Five, Henry Shirt Sew Along. This was a tough day for me! Tough but ultimately really satisfying, because everything works out. And by the end of this, your shirt is really allllmost a shirt. Miracle of mircales!

The agenda today is sewing together the yoke and sleeves. Ladies and gentlemen, can I say, until this day a "yoke" to me was always the pretty yellow inside part of an egg. Apparently, it also is what you call the upper back (and front?) part of a shirt, the part that connects the two sleeves. I figured that out a while ago, but I'd never sewn one before, and I'm just throwing it out there for anyone who is nearly as clueless as me. You're welcome.

So yoke and sleeves. I took many photos of the various steps (Steps 14 through 25 in the rad book Sewing for Boys) but the problem is this: I made a major mistake in this sewing round. I misread the diagram that shows how to pin and sew the yoke pieces to the bod. I actually misread the directions as well. My problem was I stopped stitching things together when I hit the seam on the underside of the arm.

Let me show you. 


SEE?!?!  This is where I stopped, leaving my front panels flapping in the breeze.

I don't know why I didn't get this. When rereading, I see that the diagram is really very clear, as are the directions. I guess it just comes down to never having made a garment like this, and to sewing at night or with kids running around. Distracted and clueless -- this is the result!


It wouldn't have been such a big deal, but I moved forward and stitched my arm holes together.

 
Then I took these photos, all proud of myself.


But yeah, the yoke front is still not attached. I thought that was happening at the same time that the collar would be sewn on.

It wasn't until I started work on that that I realized DUH I was supposed to stitch the whole yoke together. HAHAHA!  And I could no longer turn the shirt inside-out properly, because I'd closed up the arm holes.

Thank God for ye old seam ripper, my truest of true friends.


Ah, there. That's better.

Come back tomorrow when we'll attach the collar. And things don't go nearly as wrong there as you'd expect after this!

Don't forget to check in on Leila at Bilingual Baby. Her shirt is looking killer!