
Onto day three!
Today is all about getting prepared for the major sewing. It's the section titled "Prepare the details" and includes steps No. 1-8.
If you do this section with a sense of focus, it shouldn't take long at all. If you do it like me -- while drinking wine, watching reruns of Sex and the City and Seinfeld, and using a needle meant for knits for quite a while before realizing that's why your thread keeps going all bonkers -- than, yeah, it might take a bit longer.
First on the list is ironing on your fusible interfacing. I used a Pellon light-weight fusible web found everywhere. Follow the instructions. Easy peasy.

First you iron it to the closure strips.

Which you will then iron in half length-wise with wrong sides together. Then unfold and iron the non-interfaced length down, wrong sides together, a quarter inch. I had to be really mindful of that quarter inch, because if you have ever made your own bias tape, the instinct is to fold it all the way to the crease and then iron. Nope! Just a quarter inch.

Then you iron it onto the back of the upper collar.

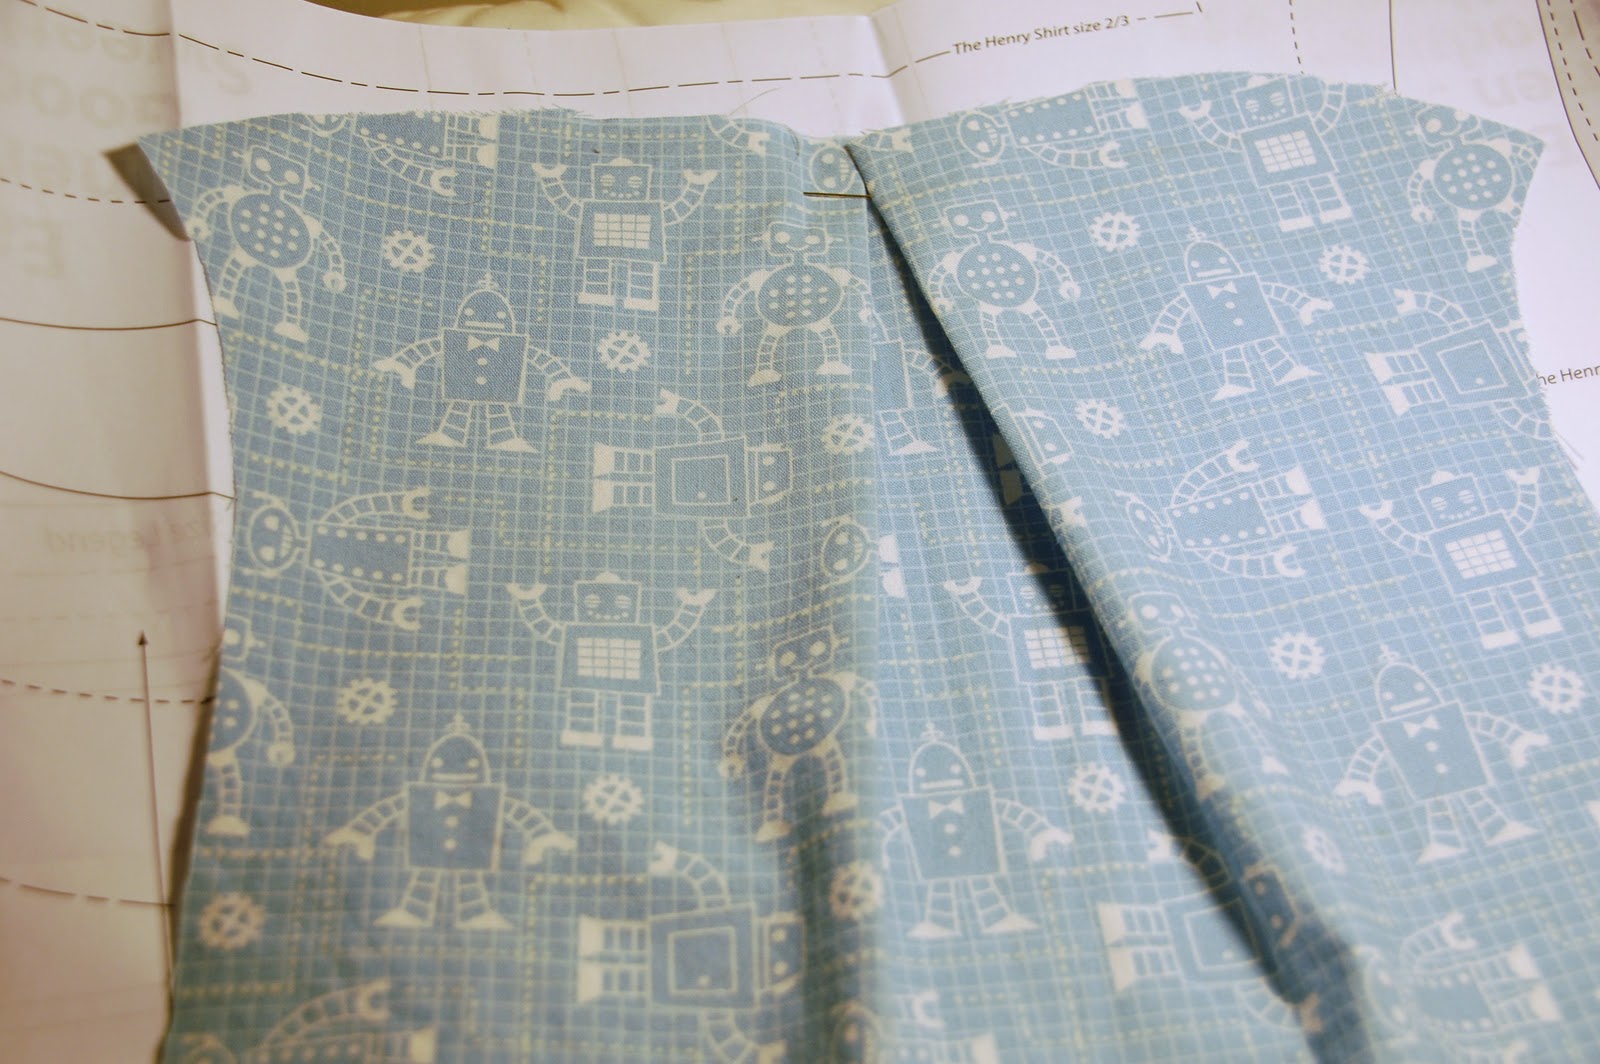
Next, you're going to make an inverted box pleat on the back. This is where I got nervous and re-read the instructions 25 times. Because "inverted box pleat" is not something I do every day. First, I put the markings on my fabric. You can do this during the cutting stage, but I often do it like this. Once my fabric is cut, I lay it right on top of the pattern paper and use a water-erasing marker, folding the fabric down to make the line line up. Does that make sense?


Here you can see the full box where the pleat will form drawn on.

Next, following the diagram in the book, I pinched the fabric together, bringing the two sides of the box together. With right sides together.

Then I sort of flattened it down.

I flipped the fabric over to see how it was looking on the right side. This matched the diagram in the book fairly well, so I am hoping I got it right. Gulp!
I pinned it and pressed it.

Then put a few basting stitches (a stitch set to your longest stitch-length with no back sewing at the beginning or end) across the top and down two inches into the pleat.

So it looks like this. And I hope that's right!


Finally, you'll add the pockets to the side panels. One note: the instructions don't call for a top-stitch along the top of the pockets. I didn't add one, but I think it might look nice if you did! The pockets first get basted along the sides (stay inside the seam allowance!)

Then the bottom is edge-stitched in place. Edge stitching is just what it sounds like -- stitching that runs right along the edge.

And that's it for today!
Hope you're having fun! The shirt is really going to come together in the next day or two. Exciting, isn't it?
Hmm, I just left a comment but it isn't showing up.
ReplyDeleteWell that one worked! I said before that I love the book and even though I'm not currently working on the Henry shirt, I'm still following along.
ReplyDeleteAwesome, Tara!
ReplyDeleteKrista, I'm having anyone from my blog come over here to see how you did the box pleat. You explained and illustrated it better than I did.