Today the shirt really starts to come together. Exciting! So let's dive in, shall we? We're doing the section of the Henry Shirt from the book
Sewing for Boys titled, "Assembling the Shirt Body," steps 9 to 13.
I think a lot of the sewing today is what elevates this project to "advanced" status. At least, that's my guess, because there are a few curved seams. Curved seams can seem very confounding when you're trying them for the first time.
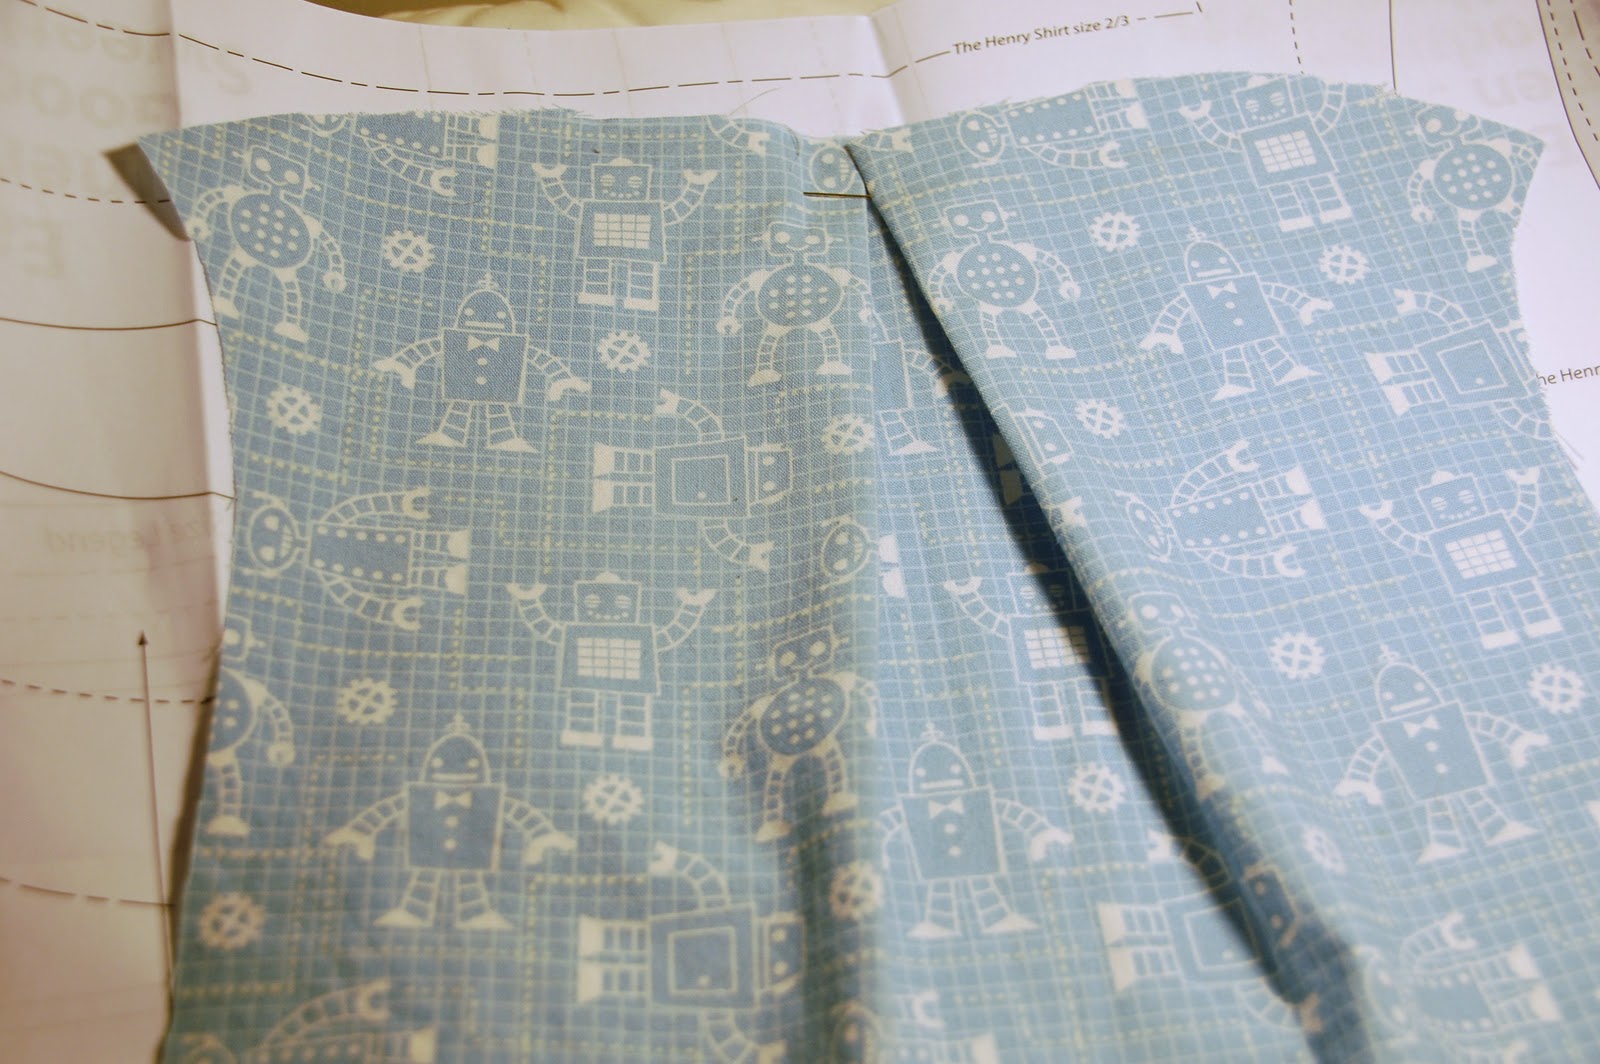
You'll line your pattern pieces up to see how they'll fit together like this.
But then when you flip to put them right-sides together, the way they'll be when you stitch them together, you find this:
They don't line up anymore, of course, since the curved parts are going different ways.
Sewing them together really feels a little like magic. It just takes some practice.
This is the tutorial I used when I learned. You can also Google if you need more help and you'll find more tutorials and even YouTube videos that walk you through it. Bottom line, it's really not that hard.
There's a good diagram in the book and the authors advise not to over pin. That's good advice. Just a few pins will do it. Start from the top point and let the fabric roll and curve a bit as you maneuver the fabric together.
Then stitch it together slowly, smoothing out little bubbles that form. They'll stay bubbly away from the seam area, but there, where it goes through the presser foot, it should be nice and smooth.
You'll do this four times, attaching the sides to the front and back panels.
The instructions each time say to then "finish the seam allowance." I actually skipped right over it the first time around and top-stitched my seam down without finishing. I think those four words are easy to miss! But what it's saying is to be sure to first finish the seam allowance by either sergering, cutting with pinking shears, or doing what I did -- using a zig-zag stitch. This ensures the fabric won't unravel when you wash and wear the shirt!
There's my finished seam.
I made one other mistake, too! It came when it was time to attach a closure strip.
First you line it up, right sides together, and pin. And stitch this edge together.
Then you sort of re-press it into place, with the crease down the middle and the other long-end ironed under a quarter inch.
I didn't do a great job of accurately pressing this the first time around. You want it so when folded in place, the fabric under the shirt just crosses over the edge of the front of the closure strip. Because when you edgestitch it in place, you want to just grab all layers of the strip.
The first time, I didn't. I missed some of the places where it was folded under. See? That wasn't going to do.
So out came my very best friend, my seam ripper! Not a big deal. It happens, right? Just rip the seam out slowly and carefully so you don't accidentally cut a hole in your fabric.
I did this, re-ironed and made sure everything was better lined up.
And that was it!
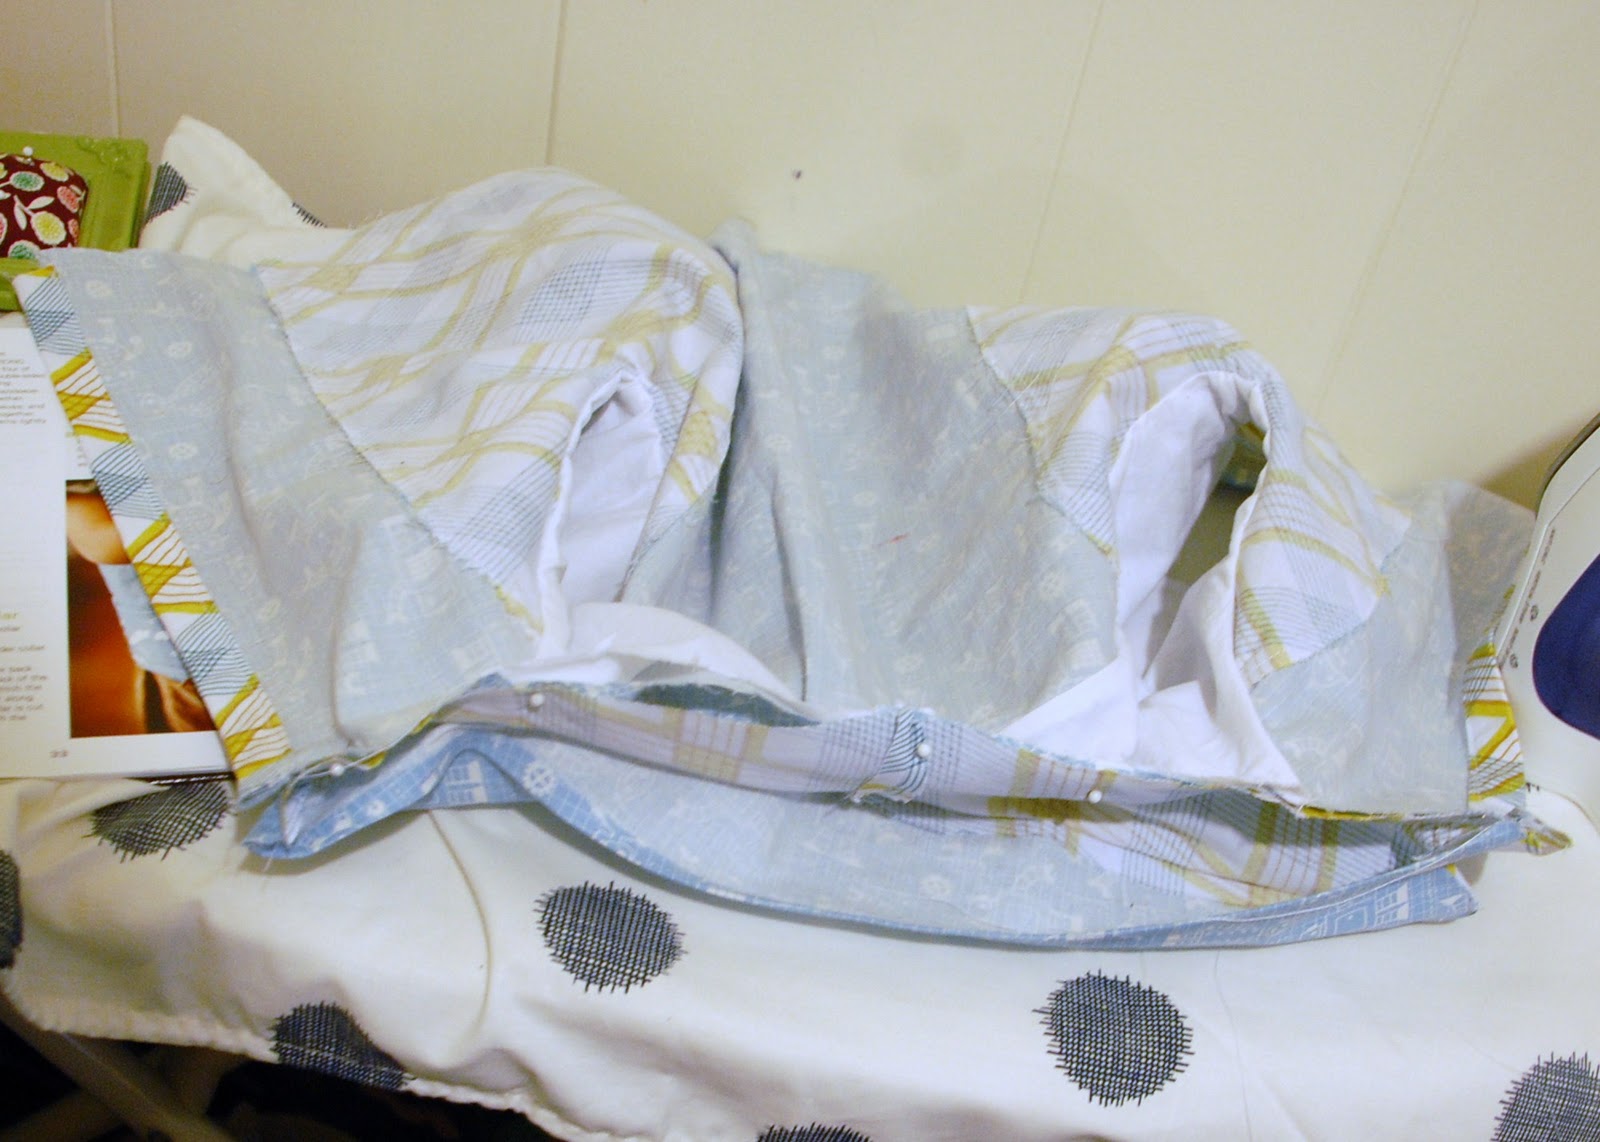
You can really see the shirt starting to come together. Isn't it fun?? My only worry right now is that it is a little boxy. My guy is SO skinny. I would not know where to begin to make it skinnier, and I wonder whether I have been using the wrong seam allowances. I'm careless at time with my seam allowances, figuring as long as I keep them all standard, it's fine. But I think I've been using 1/4 inch, not 3/8 inch. That would have helped to make things a little tighter, eh?
Be sure to check in on
Leila and see how things are going for her shirt.
And if you're sewing along, please be sure to leave us a comment! We'd love to hear how things are going for you.
Oh and Happy Halloween, from my little matador and bull!